Preliminary Exercise: Evaluation
1) Who did you work with and how did you manage the task between you?
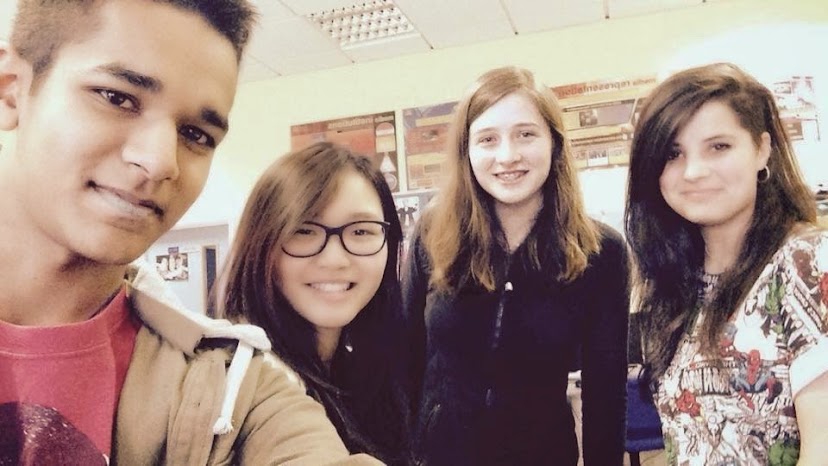
The task we were set was to film and edit a video that included continuity, of a character walking into a room and dialogue occurring between them and a second character. I worked with Audrey and Maisie on this task. We discussed what we needed to do to conform to the project brief, i.e. what continuity theories we had to use, then how we would go about doing this. None of us were particularly keen on acting, but in the end we decided that Audrey and I should be the ones acting, because I take Theatre Studies and Audrey knew the dialogue. This meant that Maisie would be shooting the majority of the video, which was also understandable on the day as she had lost her voice. We tried to split up the editing evenly, making sure that we took it in turns to edit clips and adjust the timeline, as we'd all had previous media experience so knew how to use editing software, this session allowing us to become accustomed to Adobe Premiere's controls and interface.
2) How did you plan your sequence? What processes did you use? What theories did you take into account?
During the lesson, before we actually started to plan the sequence itself, our group had a discussion about the sort of thing we wanted to do as the project. Originally we came up with an action scene, with the dialogue between the protagonist and villain including well-known movie quotes, but scripting that seemed to be very difficult so we abandoned that idea. We ended up deciding to use a Taylor Swift song's lyrics because it would be very easy to fit in, and anyone who watches it would know the lyrics. Then we made sure we had permission to use PA(?) to film, where we then blocked the sequence. We blocked the sequence as we were storyboarding to ensure that it would work as a video, standing in the area where the camera would be to see if there was enough space and we would be able to get a decent shot without breaking continuity rules. We first storyboarded the setups, with Maisie doing the drawing as she seemed to be the best at it, and then drew in the rest of the shots that would be in the sequence, as they were all from the other setups. We created a shoot board after we finished the storyboard, knowing all the setups we needed and that we would have an hour to shoot.

A page of our storyboard
Our shoot board
While story boarding, we tried to take into account the 30 degree rule, match on action, and 180 degree rule. There were several instances where we had an idea for a shot, but it broke either the 30 degree rule or 180 degree rule, so we had to adjust the shot, or scrap it.
3) What technology did you use to complete the task, and how did you use it?
We didn't use any technology to plan the shoot, other than a computer to look up and print off the lyrics of the song. For the shoot, we used a Canon DB30 camera, a tripod, headphones, and a shotgun microphone. We placed the camera in the area specified on our shoot board, then adjusted the tripod legs and height in order to get the camera in the correct position for the shot. The headphones were used to ensure that the shotgun microphone was registering the sound properly, and also to check that background noise wasn't affecting the shot too much. The tripod was also used to help us keep a steady shot during a pan, as it was easier than trying to do the shoot handheld. We had all used cameras before, I had used this camera or a camera similar for my Year 10 trailer project, so understanding how to use it was relatively easy.
To edit the sequence, we used Adobe Premiere Pro. We didn't end up using any special effects from the programme, only using the source monitor, the timeline and the timeline monitor the majority of the time. We watched videos in the source window and marked the part of the clip that we wanted, plus a second or two so that we could edit it if the selection was wrong. We dragged this onto the timeline and then cut it down to the exact selection that we wanted. We used two tracks on Adobe Premiere Pro, using diagonal editing on the tracks to help us with getting match-on-actions and make sure the dialogue flowed properly. We tried to edit evenly, taking it in turns to do a clip each (and edit the brightness and contrast) so that we all managed to get experience on Adobe Premiere Pro.
4) What factors did you have to take into account when planning, shooting and editing?
When planning, we had to take into account the amount of space there would be to put the camera, whether we'd have to move any props, what areas would be available and when, if we'd have to bring props, what angles would be best to take the shots from and what the dialogue would be. To check the space, we did a walkthrough of what the scene would be, where the camera would be positioned, and what would have to be moved in order to get the shot. We booked the media room for the lessons so that the area we wanted would be available, but during the shoot in between periods four and five, there was a lot of background noise due to the younger years moving outside, so we had to wait a few minutes before taking the shots. Choosing the dialogue was the hardest part, because we couldn't decide on what to do, so in the end we decided that doing song lyrics would be the simplest option.
During the shoot, we had to ensure that the camera was in the correct space, the framing was correct, that the background noise wouldn't affect the shot, and that we would have a match on action for the shots. Checking the camera space and framing were simple, as we just had to run the scene through before filming, looking at the camera screen to check framing and that there would be a match on action. As I said before, the background noise was slightly harder to control, so we either had to wait for the noise to stop, or use the headphones to check that it wasn't being picked up.
While editing, the main thing we had to take into account was ensuring there was a match on action so that continuity would be there. To do this, after we placed a shot on the track, we'd play the section where it would cut between that and the previous shot, checking whether we would need to move the clip slightly. This was especially true for the shots of Audrey walking in and sitting down, because we tried to get it as accurate as possible in order to meet the demands of the brief. There was at least one time that we failed to get the match on action however, when I delivered a line and the shot reverse shot at 0:12 and 0:13, my arms were crossed and suddenly changed to being on my lap. We did not realise this during the shoot, and although we tried to cut it so that it wouldn't be visible, it is still visible.
During all three stages, we had to think of how the ideas we were coming up with would suit the brief, and if not, how we could adapt the ideas and shots to meet the brief.
5) How successful was your sequence? Please identify what worked well, and with hindsight, what you would improve/do differently.
I think that our sequence was quite successful in meeting the demands of the brief, with the exception of the shot reverse shot mentioned in answer 4. The brief was to create a continuity video that involved filming and editing a character opening a door, crossing a room, sitting down in a chair opposite to another character, and exchanging a few lines of dialogue. We included all of this, following the principles of continuity, making sure not to break the 30 degree or 180 degree rule, including match on actions to ensure that the sequence made sense to the audience, and shot reverse shots to allow the audience to see the character reactions and to help obtain a smooth narrative flow. We use a pan to establish the scene and let the audience know where they are, and we use medium shots to show the audience any hand gestures and still show facial expressions.
To improve the sequence, I would ensure that actors have a run through of body movement as well as dialogue, so that the mistake made at 0:12 would not occur. I would also try to think of a better ending shot, because the mid shot that we settled on seemed like quite an anti-climatic ending, and the OTS we substituted with the mid-shot looked even less like an ending shot, leaving a lack of closure that is needed at the end of most films.
6) What have you learnt from completing this task? Looking ahead, how will this learning be significant when completing the rest of your foundation coursework, do you think?
Completing this task has made me realise how hard it is to maintain constant continuity in films. In this 19 second video, we had trouble maintaining continuity, so it's actually a lot harder than I had imagined it would be. It has also taught me about the rules of continuity, such as the 180 degree rule, which I had not heard of before, and shown me why those rules are so important to maintaining a good narrative flow.
I think that this task will be useful because it has refreshed my Adobe Premiere Pro knowledge after having used Avid instead, and also taught me about what needs to be taken into account when filming, i.e. background noise, match on actions. Our sequence was quite successful, but there were faults, such as the failed match on action at 0:12 and the abrupt ending, so this task has taught me to ensure that actors know what they're doing, have a definite ending, and ensure that when watching shots back, that we pick up on small continuity issues as well as big ones, else this mistake could occur again.


